Saturday, November 6, 2010

ABC's 25 Days of Christmas Movie Line Up


If you are like me, you already caught the Christmas bug, and everything I see related to Christmas lately brings a smile to my face.  I have always loved Christmas, but having 2 little guys makes it even better.  Get your Tivo or DVR ready.  There are tons of great movies starting on ABC family soon.  Here is a sneek peek!


Monday, June 7, 2010

Sticky Monkey Buns

Yummy Yummy Yummy! Sticky Monkey Buns...

I renamed this recipe Sticky Monkey Buns because it's kind of a cross between Sticky Buns, Pull Apart Cake, and Monkey Bread.  And I kind of think this name is funny.  My family loves the rich gooey goodness of this sweet bread.  It's pretty easy and always impresses people when you bring it somewhere.  A good recipe to keep on hand when you want to deliver some happiness to a neighbor or great to bring to a brunch!


Ingredients:
Pillsbury Buttermilk Biscuits 4 pack (shrink wrapped together)
2-4 packs of raisins (how ever much you like!)
1 cup granulated sugar
1 tablespoon cinnamon
1 stick butter 
3/4 cup dark brown sugar (light brown works too, but dark is better)


Mix cinnamon and sugar together in bowl.


Open each package of biscuits.  Break each biscuit in half and roll in cinnamon sugar mixture as shown.


Place biscuits halves in well greased bundt pan. 

Add raisins (and nuts if desired) and remaining biscuit pieces.  


Melt butter and brown sugar over low heat until runny and bubbly.


 Pour over biscuits and bake at 350 degrees for 35 minutes.

 Let cool in pan about 10 minutes before flipping onto a plate.

Place plate on top of bundt pan and flip over onto plate.  It will slide right out and you'll see all the richness of this sweet treat!  Let slightly cool before serving or after it cools wrap it in foil. Do not put in the fridge.

Enjoy your sticky monkey buns!

***Sometimes I double the butter/brown sugar topping and pour half over half the pieces and the rest over the top.  This is not needed though.  Just extra gooeyness and sweetness if you want it!

This recipe is posted on It's A Blog Party!  Check out this great site with a different link up party each day. 
What a great, fun idea!

Monday, May 17, 2010

Dress Up Cake


In about as much time as it takes to get the icing looking perfect on a "regular cake," I put together this cute little dress up cake. I was inspired by Texas Monkey's Cakes without Stress. My mother and father-in-law were happy with their 40th anniversary cake, and so was I! I uses Pepperidge Farm Pirouette Cookies around the edge, and Special Dark Pieces on top.  Icing the cake first like you normally do, stick the cookies on, and dump on the candies.  That's it!  Can't wait to do another one!


Posted by Picasa

Thursday, April 29, 2010

  • White Chocolate Dipped Cherry Shortbread
  •  
  • I can't remember where I got this recipe, but it's great in the summer with fresh dark cherries too, or perfect at Christmas time since they are red.  I like white chocolate, and it goes great with the cherries.  They're quick and most of the ingredients you probably already have!

  • Ingredients:
  • 2 1/2 c flour
  • 1/2 c sugar
  • pinch of salt
  • 1 c cold butter, cubed
  • 10 oz chopped white chocolate, divided
  • 1/2 tsp almond or vanilla extract
  • 3 drops red food coloring
  • 1/2 c maraschino cherris, drained, dried on paper towels, and finely chopped
  •  
  • Directions:
1.  Preheat oven to 325 degrees.

2.  In a large bowl, combine flour, sugar, and salt. Using a pastry blender, cut in the cubed butter until mixture resembles fine crumbs. Stir in maraschino cherries and 4 oz of the white chocolate (appx 2/3 c). Stir in extract and red food coloring. Knead mixture with hands until it forms a smooth ball.

3. Shape dough into 3/4 in balls. Place balls 1 inch apart on an ungreased cookie sheet. Using the bottom of a drinking glass dipped in powdered sugar, flatten balls into 1 1/2 inch rounds. Bake for 10-12 minutes until centers of cookies are set. Cool on cookie sheet 1 minute and then transfer to cooling racks to cool completely.

4.  In a microwaveable, heat-proof bowl, melt white chocolate on HIGH power for 1 minute, stirring after each 20 seconds until smooth and completely melted. Depending on your microwave, check the melting process carefully as the chocolate can scorch easily. Dip half of each cookie into chocolate and allow excess to drip off. Place on wax paper until chocolate is set.

To store: Layer cookies between waxed paper in airtight container and cover. Store at room temperature up to 3 days or freeze up to 3 months. Enjoy!

Wednesday, April 28, 2010

(Almost) Wordless Wednesday...Muffin Pan Surfing

Have you seen the Muffin Man?


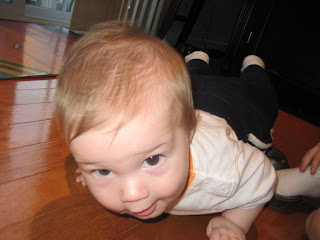
My Little Monkey who just started crawling decided to muffin pan surf. Already creative at six and a half months old. Sorry, you can't have the recipe for this. There is no copying perfection.

Posted by Picasa

Tuesday, April 27, 2010

Before and After ...Amazing Creativity

OK, so what do think of my new table?  Beautiful right?  My two year old always tells me, "Mommy, you can do anything."  I can turn this into something nice, don't cha think?


Well, here's the finished product.


Ha!  Mommy can't do everything sweetie!  I wish.  Better After highlights some awesome projects from the blogging world.  I'm up to my ears right now in potty training, teething, and just finding my sanity again after the birth of my second son.  So in the meantime I'm going to make my dream book that Cami made at Creating by Cami.


I'll keep track of my dream ideas like this one so that when I have my sanity back I am ready to go.  Way cool table.  Would like great in my dining room.  Some day Mommy.  Some day.  Until then I'll paste little pictures in my dream book and cherish the time spent laughing and playing with my baby boys and Mr. Potato Head. 

Monday, April 26, 2010

How to add a signature to your blog posts

Obviously I am new to this blogging thing and can use all the help I can get.  I stumbled upon a great tutorial site called Sneaky Mommy Blog Design that is super easy to understand, even if you know nothing about html.  I even made my own signature in about three minutes.  So check Jill out at sneaky blog.  She even answered a question I had about my blog in less than five minutes.  Gee I wish I had her knowledge.  Definitely worth bookmarking as issues arise while blogging.  Hope someone can use it!